

Source: Unsplash
Microsoft Outlook is a popular software that is mainly used for managing e-mails and appointments. You use it to receive and send your e-mails, coordinate appointments, maintain contacts, and manage tasks. Despite the fact that it is frequently used on a daily basis, one doesn’t necessarily know all of its functions. For this reason, we have compiled six useful tips for you below, which will make using Outlook even easier.
Please note that some functions are available in Microsoft Outlook, but do not work or work differently in the web application. The tips and tricks mentioned here refer to the Microsoft Outlook software, which is included in the Office package.
Tip & Trick Number 1: Creating Rules
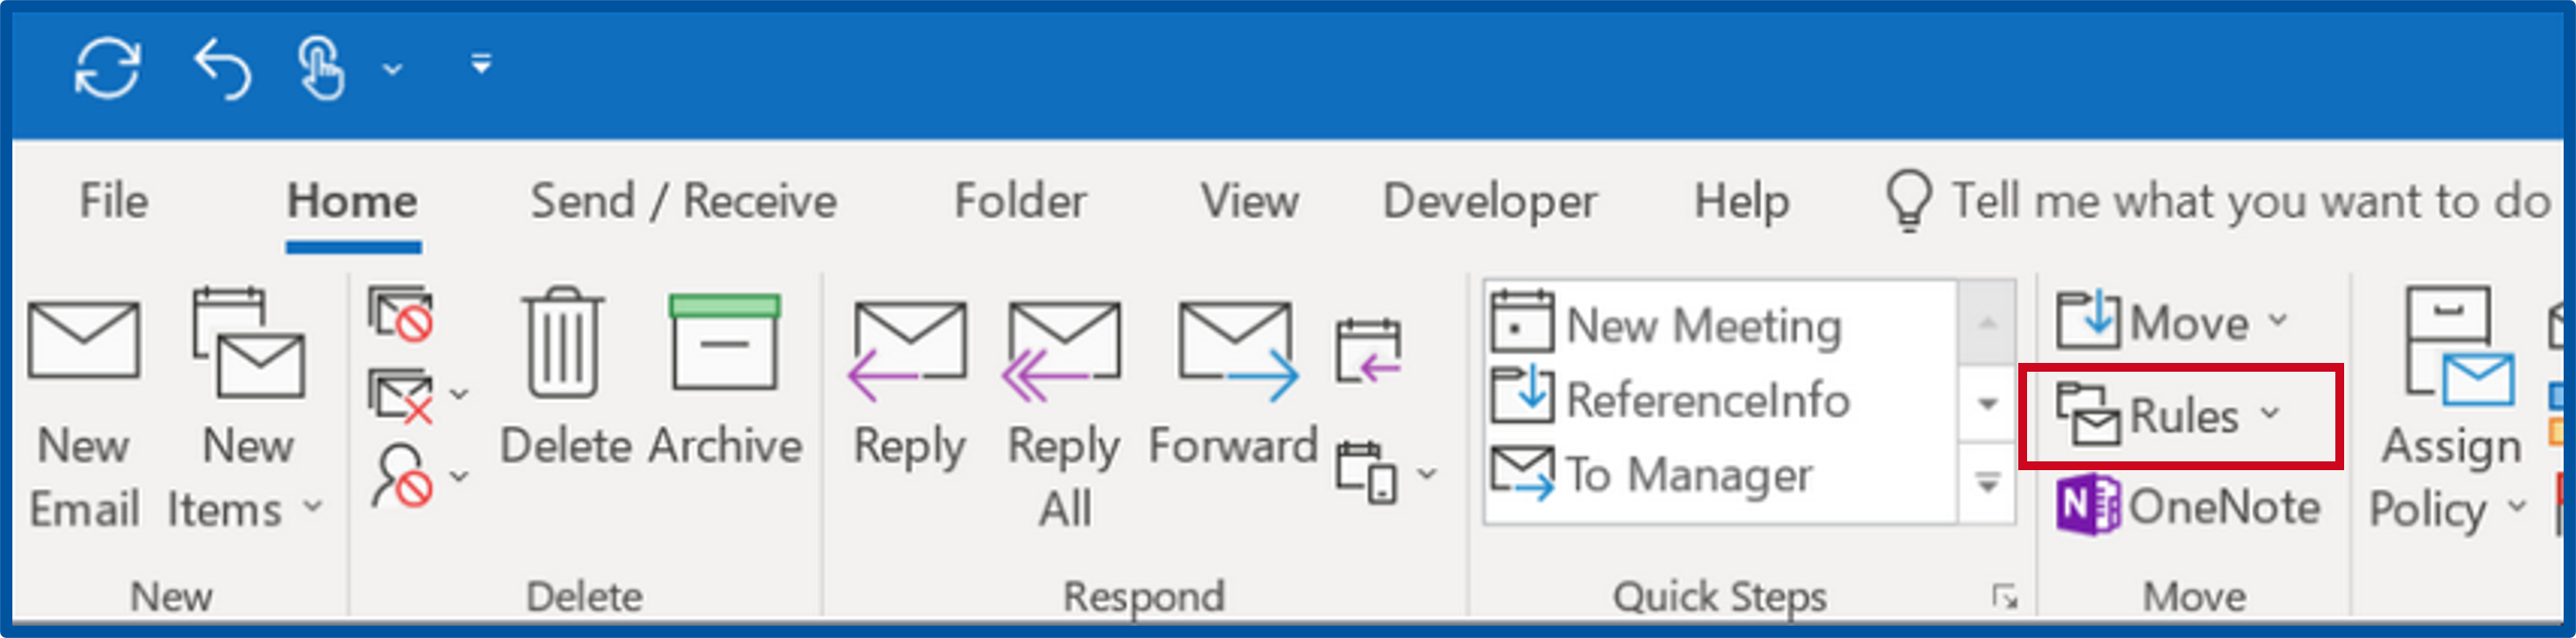
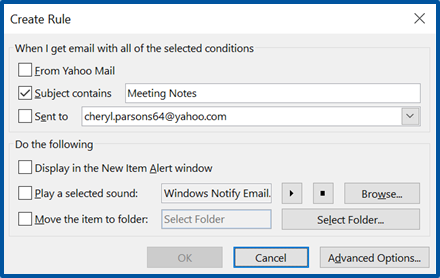
Depending on how many e-mails you receive every day, it can be difficult to keep track of them all. To tidy up your inbox and make it more manageable, you can set rules for incoming e-mails. To do this, select the e-mail in question, click on “Rules” in the “Home” tab at the top of the ribbon and then on “Create Rule”. This way you can, for example, re-sort e-mails that are sent from certain senders or have a certain subject to other folders.
Source: Microsoft Support
Source: Microsoft Support
Tip & Trick Number 2: Automatically Highlighting E-mails
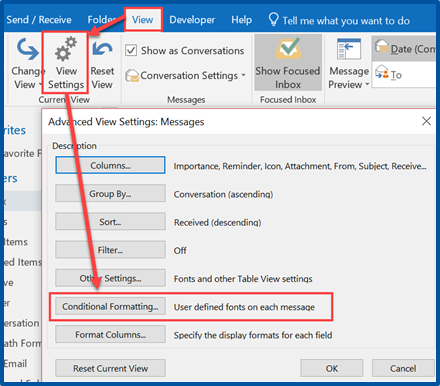
Now you’ve customized the folder structure, but your inbox view seems so monotonous that you can’t immediately see what you’re looking for. You can change that! To do so, click on the “View” tab and then on “View Settings”. Here you can select “Conditional Formatting” and define which messages should stand out from the others and how. For example, you have the option to make e-mails that are addressed exclusively to you stand out in terms of color and font.
Source: Microsoft Support
Tip & Trick Number 3: Turning E-mails Into Meetings
You receive an e-mail with the suggestion to exchange ideas in a personal meeting? Then you can even turn this e-mail into an appointment: Select the e-mail and drag and drop it onto the calendar icon in Outlook. The appointment scheduling window will open, where you can set further details of the appointment. Or would you like to drag the e-mail directly into the appropriate time slot? No problem! Then the next tip is ready for you.

Source: Own illustration
Tip & Trick Number 4: Double Screen Usage
Especially if you work with multiple screens, it is a good idea to open another Outlook window. The easiest way to do this is to move the cursor to the Outlook logo in the task bar and press the mouse wheel there. For example, if you have two screens, you can view the two views side by side in full screen mode. Addition to tip 3: Now open your inbox on one screen and your calendar on the other. This way you can drag the email with the meeting proposal into the corresponding time slot.
Tip & Trick Number 5: Scheduling E-mails
Have you ever sent an important e-mail and discovered a mistake right afterwards? In Outlook, you can schedule the sending of e-mails so that you can quickly correct your e-mail if you clicked on “Send” too early. To do this, open a new message that you want to send and click on the “Options” tab. Then select “Delay Delivery”. In the new screen you enter a time, such as 5pm. If you then click on “Send”, the e-mail will remain in your outbox until your specified time. You can still change the e-mail for this time.

Source: Microsoft Support
Tip & Trick Number 6: Using Natural Language
When you create an appointment in Outlook, you can use natural language to enter the appropriate appointment under “Start Time” instead of clicking through the calendar. So, if you want to schedule an appointment “tomorrow”, “in three weeks” or “on the first Friday in July”, type it in with those exact words. The result will surprise you.

Source: Microsoft Support
Do you know of any other Outlook hacks that aren’t as common but are a must-know? Feel free to let us know in the comments.
Responsible for the content of this article is Jelena Ćulum.